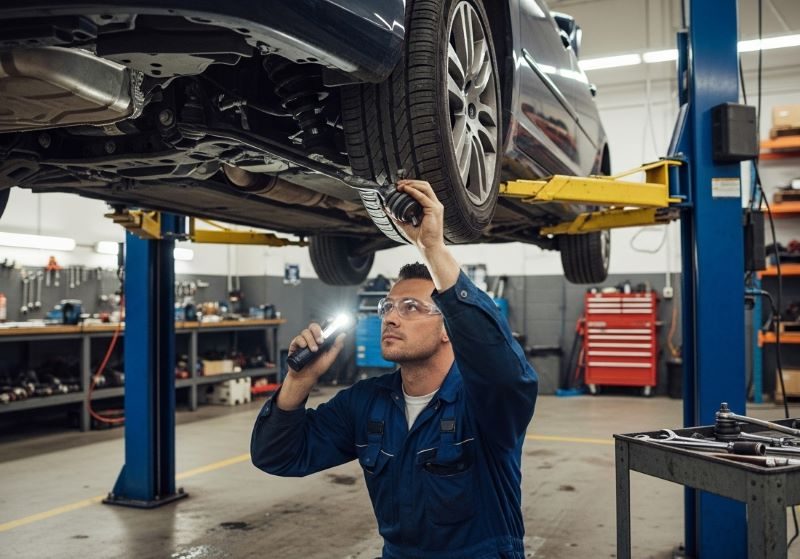
Dealing with a rusted transmission dipstick tube can be a frustrating experience for any vehicle owner. When the tube corrodes, it may break off, become stuck, or cause leaks, leading to potential transmission issues if not addressed promptly. Fortunately, with the right tools, techniques, and a bit of patience, you can remove a rusted transmission dipstick tube and restore your vehicle’s functionality. This article will guide you through the process step-by-step, ensuring you can tackle this repair confidently. For additional automotive repair insights, visit carrepro.org, a reliable resource for car maintenance tips and solutions.
Understanding the Problem: Why Transmission Dipstick Tubes Rust
Transmission dipstick tubes are typically made of metal, making them susceptible to rust, especially in older vehicles or those exposed to harsh environmental conditions like road salt or humidity. Over time, rust can weaken the tube, causing it to break off or become lodged in the transmission housing. In some cases, the tube may be so rusted that it’s flush with the transmission, making removal challenging. For instance, if you’re dealing with a situation where the transmission tube rusted off flush and will not come out, you’ll need specialized techniques to extract it without damaging the transmission.
Rust forms when moisture and oxygen interact with the metal surface, particularly in areas prone to exposure. Neglecting regular maintenance, such as checking for corrosion or cleaning the undercarriage, can accelerate this process. Therefore, addressing a rusted dipstick tube promptly is crucial to prevent further damage, such as transmission fluid leaks or contamination.
Tools and Materials Needed
Before starting the removal process, gather the necessary tools and materials to ensure a smooth repair. Having everything on hand will save time and prevent frustration during the job. Here’s what you’ll need:
- Penetrating oil: Products like WD-40 or PB Blaster to loosen rust.
- Screwdriver or pry bar: For leveraging the tube out.
- Pliers or vice grips: To grip and twist the tube.
- Hammer and chisel: For stubborn, flush tubes.
- Drill and easy-out tool: For tubes rusted flush with the transmission.
- Replacement dipstick tube: Ensure it matches your vehicle’s make and model.
- Shop rags and degreaser: For cleaning the area.
- Safety gear: Gloves, safety glasses, and a mask to protect against rust particles.
Additionally, keep a container handy to catch any transmission fluid that may leak during the process. Always work in a well-ventilated area and follow safety protocols to avoid injury.

Step-by-Step Guide to Removing a Rusted Transmission Dipstick Tube
Follow these steps to remove a rusted transmission dipstick tube effectively. Each step is designed to address varying levels of rust and tube damage, ensuring you can handle even the most stubborn cases.
Step 1: Prepare the Vehicle
Park your vehicle on a flat surface and engage the parking brake. Disconnect the battery to prevent any electrical issues. Locate the transmission dipstick tube, typically found near the transmission fluid pan or firewall. Drain the transmission fluid if necessary to minimize spills, though this may not always be required for dipstick tube removal.
Step 2: Apply Penetrating Oil
Spray a generous amount of penetrating oil around the base of the dipstick tube where it meets the transmission housing. Allow the oil to soak for 10-15 minutes to break down rust and loosen the tube. For heavily rusted tubes, repeat this process multiple times to maximize penetration. This step is critical, as it reduces the force needed to extract the tube and minimizes the risk of damaging the transmission.
Step 3: Attempt Manual Removal
Using pliers or vice grips, gently grip the tube and attempt to twist it counterclockwise. Apply steady pressure to avoid bending or breaking the tube further. If the tube moves, continue twisting and pulling until it comes free. However, if the tube is rusted flush or stuck, proceed to the next steps.
Step 4: Use a Screwdriver or Pry Bar
For tubes that are partially protruding but stuck, insert a flathead screwdriver or pry bar under the tube’s lip and gently pry upward. Work around the tube’s circumference to loosen it evenly. Be cautious not to apply excessive force, as this could damage the transmission housing. If the tube remains stuck, move to more aggressive methods.
Step 5: Employ a Hammer and Chisel
If the tube is rusted flush with the transmission, use a hammer and chisel to create a starting point for removal. Position the chisel at the edge of the tube and tap gently to create a small indentation or lip. This can provide enough grip for pliers or a pry bar to extract the tube. Work carefully to avoid damaging the surrounding area.
Step 6: Drill and Use an Easy-Out Tool
For tubes that are completely flush and immovable, drilling may be necessary. Select a drill bit slightly smaller than the tube’s inner diameter and carefully drill into the center of the tube. Then, insert an easy-out tool (a reverse-threaded extractor) into the drilled hole. Turn the easy-out counterclockwise to grip the tube and pull it out. This method requires precision, so take your time to avoid damaging the transmission housing. For more detailed guidance on drilling techniques, refer to Motor Trend’s guide on automotive repairs.
Step 7: Clean and Inspect the Area
Once the tube is removed, clean the transmission housing opening with a degreaser and shop rag to remove rust, debris, and old sealant. Inspect the area for damage, such as cracks or stripped threads, which may require additional repairs. If the housing is damaged, consult a professional mechanic to assess whether it can be repaired or if a replacement part is needed.
Step 8: Install the New Dipstick Tube
Apply a thin layer of transmission-safe sealant around the base of the new dipstick tube to ensure a secure fit. Insert the tube into the transmission housing, pressing firmly until it seats properly. If the tube requires a retaining bolt or clip, secure it according to your vehicle’s specifications. Refill the transmission fluid if any was lost during the process, and check for leaks.
Tips for Success
To ensure a successful repair, keep these tips in mind:
- Work patiently: Rushing can lead to damage or incomplete removal.
- Use quality tools: Cheap tools may break or slip, complicating the process.
- Check compatibility: Ensure the replacement tube matches your vehicle’s specifications.
- Monitor fluid levels: After installation, check the transmission fluid level and top off if necessary.
- Seek professional help: If the tube is too damaged or the transmission housing is compromised, consult a mechanic.
By following these steps and tips, you can remove a rusted transmission dipstick tube efficiently and prevent further issues with your vehicle’s transmission system.
Frequently Asked Questions (FAQs)
Here are answers to some common questions about removing a rusted transmission dipstick tube:
- Can I drive with a broken dipstick tube?
Driving with a broken or missing dipstick tube can lead to fluid leaks and contamination, potentially causing transmission damage. It’s best to replace the tube as soon as possible. - How long does it take to remove a rusted dipstick tube?
The process can take 30 minutes to 2 hours, depending on the level of rust and the tools available. Stubborn tubes may require more time and effort. - What if the tube is stuck and won’t budge?
If the tube is stuck, apply more penetrating oil, let it soak, and try using an easy-out tool or consult a professional mechanic for assistance. - Do I need to drain the transmission fluid before removing the tube?
Draining the fluid is not always necessary, but it can prevent spills and make the process cleaner. Be prepared to catch any fluid that leaks during removal. - Can I prevent dipstick tube rust in the future?
Regular maintenance, such as cleaning the undercarriage and applying rust inhibitors, can help prevent corrosion. Inspect the tube periodically for early signs of rust.
Conclusion
Removing a rusted transmission dipstick tube may seem daunting, but with the right approach, tools, and patience, it’s a manageable DIY repair. By following the steps outlined above, you can address the issue effectively and prevent further damage to your vehicle’s transmission. Regular maintenance and timely repairs are key to keeping your vehicle in top condition. For more automotive repair resources and expert advice, websites like carrepro.org offer valuable insights to guide you through the process. Tackle the job with confidence, and your vehicle will be back on the road in no time.
Read More: How to Replace a Kingpin on a Semi-Truck