Classic cars deserve special care. Their paint is older, thinner, and far more delicate than modern finishes. Therefore, choosing the right tools matters a great deal. Soft automobile polishing pads are among the best tools you can use. They protect the paint while delivering a brilliant shine.
This guide will walk you through the full detailing process. You will learn how to pick the right pads, prepare the surface, and apply polish correctly. Additionally, you will find tips to maintain that showroom finish for years to come.
Why Classic Cars Need a Gentler Approach
Older paint formulas are nothing like modern clear coats. Vintage vehicles often used single-stage paint, which means the color and gloss layer are combined into one. This makes the surface more vulnerable to swirl marks and scratches.
Modern orbital polishers and harsh pads can cut too aggressively. They can burn through the paint in just seconds. However, soft foam and microfiber polishing pads distribute pressure more evenly. As a result, they remove light imperfections without damaging the underlying layers.
Additionally, many classic cars have not been properly maintained over the decades. The paint may already have oxidation, water spots, or minor scratches. A gentle approach helps you restore the finish safely and gradually.
Understanding Soft Automobile Polishing Pads
Not all polishing pads are the same. They come in different materials, sizes, and densities. Knowing the differences helps you choose the right pad for each task.
Types of Soft Polishing Pads
- Foam finishing pads: These are the softest option. They are ideal for applying wax or sealant as a final step. They leave a smooth, swirl-free surface.
- Foam polishing pads: These have a slightly firmer texture. They work well for light paint correction and removing minor swirls.
- Microfiber polishing pads: These combine gentle cutting action with excellent product absorption. They are great for single-stage paints common on classic vehicles.
- Wool pads: Although wool can be aggressive, soft wool blends offer a middle ground. They remove oxidation effectively without being too harsh.
For most classic car work, foam finishing and foam polishing pads are your safest choices. They give you control and reduce the risk of paint damage.
Pad Size and Compatibility
Pad size should match your polisher’s backing plate. Most hobbyists use a five or six-inch pad with a dual-action orbital polisher. Smaller three-inch pads work well for tight spots like door handles and around trim.
Always match the pad to the compound or polish you plan to use. Manufacturers often recommend specific pad types for their products. Following those recommendations leads to better results.
Tools and Supplies You Will Need
Before you begin, gather everything you need. Having all your supplies ready saves time and keeps the process smooth.
- Dual-action orbital polisher
- Soft foam finishing pad
- Soft foam polishing pad
- Microfiber polishing pad (optional)
- Car wash soap and a wash mitt
- Clay bar kit
- Light machine polish or compound
- Finishing glaze or wax
- Microfiber towels
- Detailing spray
- Masking tape for trim protection
Keep multiple clean microfiber towels nearby. You will use them often throughout the process. Having them ready prevents cross-contamination between steps.
Step-by-Step Guide to Detailing Classic Cars with Soft Polishing Pads
Step 1: Wash the Car Thoroughly
Start with a proper two-bucket hand wash. Use one bucket for soapy water and another for rinsing your mitt. This simple method removes dirt without dragging it across the paint.
Rinse the car from top to bottom. Then dry it gently with a clean microfiber drying towel. Never let the car air dry, as water spots can form quickly and are difficult to remove later.
Step 2: Decontaminate the Paint Surface
After washing, run your fingers over the paint. If it feels rough or gritty, contamination is present. Clay barring removes bonded contaminants that washing cannot eliminate.
Spray a section with clay lubricant and rub the clay bar back and forth gently. Work in small sections. Then wipe away the residue with a microfiber towel. The paint should feel smooth and glassy when you are done.
Step 3: Inspect the Paint Under Good Lighting
Move the car under bright lighting or use a detailing work light. Inspect the paint carefully for swirl marks, scratches, and oxidation. This tells you how much correction is needed.
On classic cars, you may notice heavy oxidation on horizontal panels like the hood and roof. These areas receive the most sun exposure. Therefore, they often need more attention during the polishing stage.
Step 4: Tape Off Trim and Rubber Seals
Protect rubber seals, plastic trim, and chrome accents with masking tape. Polish and compound can stain these surfaces. Additionally, they are difficult to clean once the product dries into them.
Take your time with this step. Careful masking prevents accidental staining and makes the final cleanup much easier.
Step 5: Prime Your Polishing Pad
A dry pad absorbs too much product on the first pass. Therefore, prime it before you start. Apply a small amount of polish to the pad and spread it over the surface by hand. This fills the pores and ensures even product distribution from the start.
Step 6: Apply Polish with a Soft Pad
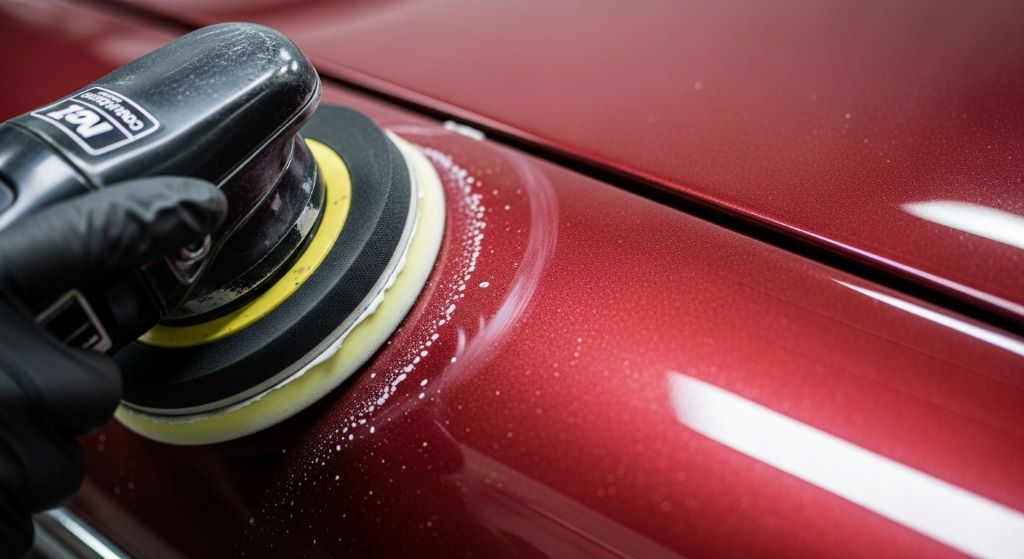
Place four to five small dots of polish on a panel. Then spread the product at low speed before increasing the polisher’s speed. Work in overlapping passes using a cross-hatch pattern.
Keep the polisher moving at all times. Stopping in one place generates excessive heat, which can damage delicate vintage paint. Use light to medium pressure and let the machine do the work.
Work on one panel at a time. This ensures the polish does not dry before you can wipe it away. Generally, two to three passes per section are enough for light correction on classic paint.
Step 7: Wipe Away the Residue
Once the polish turns clear or hazy, stop the polisher. Wipe the residue away immediately using a clean microfiber towel. Use a gentle flipping motion to remove the product without reintroducing swirls.
Inspect the panel after wiping. If swirl marks remain, you can repeat the process. However, do not overwork the paint. Vintage finishes have limited thickness, so restraint is important.
Step 8: Switch to a Finishing Pad for Final Polishing
After correction, switch to a soft foam finishing pad. Apply a finishing glaze or a fine polish. This step removes any light marring left by the polishing pad and brings out the deepest gloss.
Work the finishing product in the same overlapping pattern. Use low speed and very light pressure. The goal here is refinement, not correction.
Step 9: Apply a Wax or Paint Sealant
The final step is protection. Apply a carnauba wax or paint sealant to lock in the shine and protect the paint from the elements. Use a soft foam applicator pad for hand application, or a finishing pad on the polisher for machine application.
Allow the wax to haze according to the manufacturer’s instructions. Then buff it away with a clean microfiber towel using light, circular motions. The result should be a deep, lustrous finish that honors the car’s original beauty.
How to Clean and Maintain Your Polishing Pads
Polishing pads last longer when you take care of them properly. A dirty pad loses its effectiveness quickly and can actually mar the paint instead of improving it.
During detailing, use a pad cleaning brush to remove product buildup every few passes. Simply hold the brush against the pad while the polisher spins at low speed. This restores the pad’s texture and keeps it working efficiently.
After each session, wash foam pads by hand with warm water and a small amount of dish soap. Squeeze gently and rinse thoroughly. Never wring them out forcefully, as this damages the foam cells.
Allow pads to air dry completely before storing them. Store them flat in a clean container to prevent deformation. Additionally, replace pads that show visible wear, tears, or permanent staining.
Common Mistakes to Avoid When Detailing Classic Cars
Even experienced detailers make mistakes. However, being aware of the most common ones helps you avoid them.
- Using too much product: A small amount of polish goes a long way. Excess product creates unnecessary mess and can be hard to remove.
- Working in direct sunlight: Heat causes polish to dry too fast, making it harder to remove and less effective. Always work in a shaded area.
- Using a single pad for everything: Different pads serve different purposes. Mixing them up leads to poor results.
- Skipping the wash step: Polishing over dirt is a recipe for scratches. Always start with a clean surface.
- Pressing too hard: The weight of the polisher is usually enough. Extra pressure causes heat buildup and uneven correction.
Conclusion
Detailing a classic car is a rewarding experience. It brings tired paint back to life and honors the history of the vehicle. Soft automobile polishing pads are essential to that process. They protect delicate vintage finishes while delivering impressive results.
To summarize, always start with a thorough wash and decontamination. Then inspect the paint carefully and tape off sensitive areas. Use a soft foam polishing pad for correction and a finishing pad for final refinement. Finish with a quality wax for long-lasting protection.
Additionally, remember to clean and store your pads properly after every use. Good pad care extends their life and keeps your results consistent. With patience and the right technique, your classic car will shine like it just rolled off the showroom floor.
Frequently Asked Questions
1. Can I use a regular polishing pad on vintage paint?
You can, but it is not recommended. Vintage single-stage paint is thinner and more sensitive than modern clear coats. Therefore, using a soft foam or microfiber pad specifically designed for light correction is always the safer choice.
2. How often should I polish my classic car?
Polishing removes a tiny layer of paint each time. For classic cars, limit machine polishing to once or twice a year. Between sessions, use a detailing spray and gentle hand washing to maintain the finish.
3. What speed should I use on a dual-action polisher for classic paint?
Start at a low speed of around two to three to spread the product. Then increase to a medium speed of four to five for actual polishing. Avoid high speeds on delicate vintage finishes, as the heat generated can cause damage quickly.
4. Is it better to polish by hand or machine on older cars?
A dual-action orbital polisher with a soft pad is generally safer and more effective than hand polishing. However, for very small areas or extremely fragile paint, hand polishing with a soft applicator pad gives you more control.
5. How do I know when to stop polishing a section?
The polish will turn clear or begin to look hazy when it has been fully worked. At that point, stop the polisher and wipe the residue away immediately. Over-polishing a section removes too much paint and can cause dull spots or burn-throughs.
Related Topics:
The Invisible Enemy: How to Remove Water Spots from Car Glass
Ultimate Guide to Choosing the Best Headlight Polishing Kit for Crystal-Clear Visibility