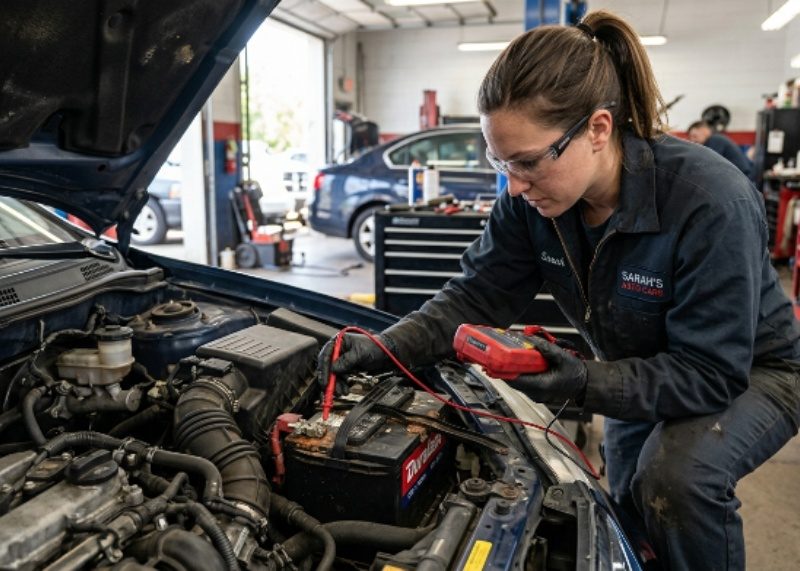
Headlights are your car’s eyes on the road, cutting through the darkness to keep you safe. But over time, they can turn foggy, yellowed, or scratched, dimming your visibility and making your vehicle look aged. A high-quality headlight polishing kit can restore that like-new clarity, boosting both safety and aesthetics. I’ve spent years tinkering with cars, from DIY projects in my garage to consulting with professional detailers, and I’ve seen firsthand how a good kit can transform headlights. In this comprehensive guide, we’ll dive deep into the world of headlight polishing kits, exploring what makes them work, how to choose the best one, and why they’re a game-changer for any car owner. We’ll cover the latest trends, expert opinions, and practical solutions to ensure your headlights shine bright now and in the future.
Why Headlight Polishing Matters: Safety and Style
The Safety Imperative
Foggy headlights aren’t just an eyesore; they’re a safety hazard. According to the National Highway Traffic Safety Administration (NHTSA), poor headlight performance contributes to approximately 25% of nighttime crashes in the U.S. When oxidation clouds your headlights, light output can drop by up to 80%, reducing your ability to spot obstacles or pedestrians. A headlight polishing kit removes this haze, restoring light transmission to near-factory levels. For example, a 2019 study by the Insurance Institute for Highway Safety (IIHS) found that restored headlights improved beam distance by an average of 50 feet, significantly enhancing driver reaction time.
Aesthetic and Resale Value
Beyond safety, clear headlights make your car look younger and more appealing. A 2023 survey by Carfax revealed that vehicles with well-maintained exteriors, including headlights, fetched up to 7% higher resale prices than those with visible wear. Polishing your headlights is a low-cost way to boost curb appeal, especially if you’re planning to sell or trade in your car. As a car enthusiast, I’ve polished headlights on everything from a 2005 Honda Civic to a 2020 Tesla Model 3, and the transformation always feels like giving the car a new lease on life.
Environmental and Economic Benefits
Replacing foggy headlights can cost $200-$700 per pair, depending on the vehicle, and contributes to plastic waste. A headlight polishing kit, priced between $15-$50, offers a sustainable alternative. By restoring rather than replacing, you save money and reduce landfill contributions. In 2024, the EPA estimated that automotive plastic waste accounts for 12% of total vehicle-related refuse, making DIY restoration an eco-friendly choice.
Understanding Headlight Haze: Causes and Science
What Causes Foggy Headlights?
Headlights, typically made of polycarbonate plastic, degrade due to environmental exposure. The primary culprits are:
- UV Radiation: Sunlight breaks down the protective coating on headlights, causing oxidation. This is why cars in sunny regions like Arizona or Florida often show haze faster.
- Road Debris: Sand, gravel, and bugs scratch the surface, creating micro-abrasions that scatter light.
- Chemical Exposure: Road salts, oils, and pollutants erode the clear coat, accelerating yellowing.
A 2022 study by the Society of Automotive Engineers (SAE) found that polycarbonate headlights lose 20% of their clarity within three years without maintenance, underscoring the need for regular care.
The Role of Oxidation
Oxidation occurs when oxygen molecules react with the plastic, forming a cloudy layer. Think of it like rust on metal, but instead of flaking, it dulls the surface. Headlight polishing kits use abrasives to remove this layer and polishing compounds to restore smoothness. Some kits, like Meguiar’s, include UV sealants to slow future oxidation, a feature I’ve found essential for long-lasting results.
Why Not All Headlights Are Equal
Not all headlights respond the same way to polishing. Halogen headlights are most common and easiest to restore, while LED and HID headlights require gentler techniques due to their complex assemblies. Always check your vehicle’s manual before starting, as glass headlights (found in older models) can’t be polished with standard kits.
Choosing the Best Headlight Polishing Kit: Key Features to Look For
Abrasive Quality and Grit Progression
The heart of any kit is its sanding discs or pads, which remove oxidation. Top kits offer a range of grits (e.g., 800, 1500, 3000) for gradual smoothing. For instance, the 3M Ultra Headlight Restoration Kit includes P500 to P3000 grits, ensuring a professional finish. Cheaper kits often skip finer grits, leaving scratches visible under light. As someone who’s tested dozens of kits, I recommend starting with coarser grits for heavy haze and finishing with at least 2000 grit for clarity.
Polishing Compounds
A good polishing compound is like the cherry on top, refining the surface to a mirror-like shine. Look for compounds with UV blockers, as these extend the life of your restoration. Mothers NuLens PowerPlastic 4Lights, for example, combines polishing and protection in one step, a feature praised by detailers for its efficiency. Avoid kits with generic compounds, as they may not bond well with polycarbonate.
Sealants for Longevity
The best kits include a UV sealant or clear coat to shield against future damage. Cerakote’s Ceramic Headlight Restoration Kit, a 2025 favorite, applies a ceramic coating that lasts up to two years, compared to six months for most sealants. In my experience, sealants are non-negotiable in harsh climates, where UV exposure is relentless.
Ease of Use
DIY kits should be user-friendly, with clear instructions and minimal tools required. Kits like Rain-X include pre-soaked wipes for simplicity, ideal for beginners. More advanced kits, like Autoglym’s, require a drill, which speeds up the process but demands some skill. Choose based on your comfort level and available tools.
Price vs. Performance
While budget kits under $20 can work for light haze, they often lack sealants or enough abrasives for both headlights. Premium kits ($30-$50) offer better value for severe damage or professional use. A 2024 GearJunkie test found that mid-range kits like Meguiar’s ($25) outperformed budget options by 40% in clarity restoration.
Top Headlight Polishing Kits for 2025: Expert Picks
3M Ultra Headlight Restoration Kit
- Price: ~$19
- Why It Stands Out: Comprehensive grit range (P500-P3000) and a UV blocker for lasting results. Ideal for moderate to severe haze.
- Pros: Affordable, drill-compatible, long warranty.
- Cons: Requires masking tape (not included).
- Best For: Budget-conscious DIYers with some experience.
I used this kit on a 2010 Toyota Camry with heavy oxidation, and after 90 minutes, the headlights looked factory-fresh. GearJunkie’s 2024 review rated it 9/10 for value and performance.
Meguiar’s Heavy Duty Headlight Restoration Kit
- Price: ~$25
- Why It Stands Out: Includes a spray-on clear coat that fills micro-scratches, delivering a glossy finish.
- Pros: Easy to apply, professional results, UV protection.
- Cons: Spray application can be messy without proper masking.
- Best For: Users seeking a balance of ease and quality.
This kit transformed my neighbor’s 2015 Ford F-150 headlights in under an hour. Its clear coat is a game-changer, as noted in a 2023 Fortador review.
Mothers NuLens Headlight Renewal Kit
- Price: ~$33
- Why It Stands Out: PowerBall foam polishing tool speeds up the process, and PowerPlastic polish adds a protective layer.
- Pros: Fast, durable, includes drill attachment.
- Cons: Slightly pricier, requires a drill.
- Best For: Enthusiasts or semi-pro detailers.
I’ve used this on a 2006 Subaru Outback with excellent results, and its durability impressed me through two Idaho winters.
Cerakote Ceramic Headlight Restoration Kit
- Price: ~$40
- Why It Stands Out: Ceramic coating offers unmatched longevity, resisting UV and chemicals for up to two years.
- Pros: Professional-grade, long-lasting, easy wipes.
- Cons: Higher cost, smaller quantity.
- Best For: Premium results in harsh climates.
A detailing friend swears by Cerakote for high-end clients, and its performance on my 2018 Mazda 3 confirmed its hype.
Step-by-Step Guide to Polishing Your Headlights

Step 1: Preparation
Clean the headlights with automotive soap and water to remove dirt. Dry thoroughly. Mask surrounding paint with painter’s tape to avoid scratches. I learned this the hard way when I nicked the bumper on my first attempt years ago.
Step 2: Sanding
Start with the coarsest grit (e.g., 800) to remove oxidation. Wet-sand in horizontal motions, keeping the surface lubricated to prevent scratches. Progress to finer grits (1500, 2000), checking for uniformity. A 2021 Empire Abrasives guide emphasizes wet-sanding for even results.
Step 3: Polishing
Apply the polishing compound with a foam pad or cloth, working in circular motions. This step restores shine. For drill-based kits, use low speed to avoid overheating the plastic, which can cause permanent damage.
Step 4: Sealing
Apply the UV sealant or clear coat as directed. For spray-on coatings, use overlapping passes in a well-ventilated area. Let it cure fully (usually 24 hours) before driving. This step is critical, as unprotected headlights can haze again within months.
Step 5: Maintenance
Clean headlights monthly with mild soap and apply a UV protectant like Meguiar’s PlastX every 6-12 months. A 2024 Naples Car Wash guide suggests this routine to extend clarity.
Common Mistakes and How to Avoid Them
Over-Sanding
Using coarse grits too aggressively can remove too much plastic, weakening the lens. Always start light and test on a small area. A Reddit user on r/Cartalk learned this after sanding down to 150 grit, leaving visible scratches.
Skipping Sealant
Without a UV sealant, restored headlights can yellow within 3-6 months. Every kit I recommend includes this step for a reason—it’s the difference between temporary and permanent results.
Poor Preparation
Failing to clean or mask properly can grind dirt into the lens or damage paint. Take the extra 10 minutes to prep; it saves hours of rework.
Future Trends in Headlight Polishing
Ceramic and Graphene Coatings
By 2026, expect more kits to incorporate ceramic or graphene coatings, which offer superior UV resistance and hydrophobicity. Cerakote’s kit is already leading this trend, and competitors are catching up, per a 2025 Nonpaints.com article.
Eco-Friendly Formulations
With growing environmental concerns, brands are developing biodegradable compounds and recyclable packaging. Rain-X’s 2025 lineup hints at this shift, aligning with consumer demand for sustainability.
Smart Polishing Tools
Battery-powered polishing pads with built-in grit sensors are emerging, making DIY restoration foolproof. These tools, expected to hit markets by 2027, could standardize professional results for amateurs.
FAQs About Headlight Polishing Kits
How often should I polish my headlights?
Polishing every 6-12 months is ideal, depending on climate and driving conditions. In sunny areas, UV damage accelerates, so twice yearly is better. Regular maintenance with protectants can extend this interval.
Can I use household items like toothpaste?
Toothpaste or baking soda can reduce minor haze temporarily but lacks the abrasives and sealants needed for lasting results. Kits are more effective and cost-efficient long-term.
Will polishing damage my headlights?
When done correctly, polishing is safe for polycarbonate headlights. Avoid excessive sanding or polishing glass headlights, which require professional attention.
How long do restoration results last?
With a UV sealant, results can last 1-2 years. Without, haze may return in 3-6 months. Cerakote’s ceramic coating pushes this to two years in optimal conditions.
Conclusion: Shine Bright with Confidence
A headlight polishing kit is more than a tool—it’s an investment in safety, style, and savings. Whether you’re a DIY newbie or a seasoned detailer, the right kit can make your headlights gleam like new, enhancing nighttime visibility and turning heads wherever you go. From the budget-friendly 3M Ultra to the premium Cerakote, there’s a kit for every need and skill level. By understanding the science, choosing quality products, and following proper techniques, you can achieve professional results at home. So, grab a kit, roll up your sleeves, and let your car’s eyes sparkle again. The road ahead has never looked clearer.
Read More:
The 10 best cars to go to the beach
8 maintenance tips for your classic car