A dead battery, flickering lights, or a car that simply will not start — these are signs of car wiring issues that frustrate drivers every day. The causes can range from a blown fuse to a corroded ground connection. However, you do not need to rush to a mechanic every time something goes wrong.
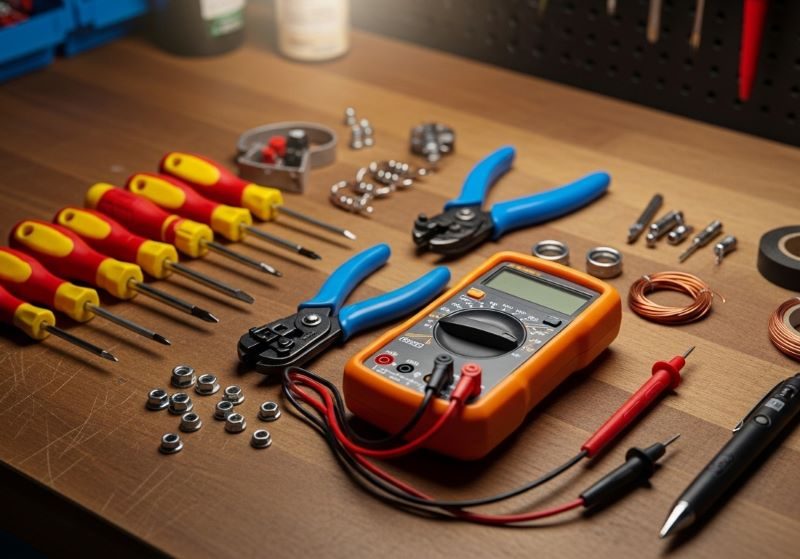
A multimeter is one of the most useful tools you can own. It measures voltage, resistance, and current in an electrical circuit. Therefore, with a little practice, you can diagnose many problems right in your driveway. This auto repair guide will walk you through the process step by step, so you feel confident every time you pop the hood.
What Is a Multimeter and Why Do You Need One?
A multimeter is a handheld device that tests electrical circuits. It combines three tools into one: a voltmeter, an ammeter, and an ohmmeter. You can use it to check battery voltage, test fuses, trace wiring problems, and much more.
Most auto parts stores sell decent digital multimeters for under thirty dollars. You do not need an expensive model for basic car diagnostics. A simple unit with a clear display and reliable probes is all you need to get started.
Additionally, learning to use a multimeter is a skill that pays for itself quickly. Even one successful home diagnosis can save you a significant amount in labor costs at a shop.
Safety First: What to Do Before You Begin
Working with electrical systems can be dangerous if you skip safety steps. Therefore, always follow these precautions before testing anything:
- Turn off the ignition before probing any wiring unless the test specifically requires the engine to be running.
- Wear safety glasses and rubber-insulated gloves when working near the battery.
- Never touch both battery terminals at the same time with metal tools.
- Keep the work area dry. Water and electricity are a hazardous combination.
- If you smell burning plastic or see smoke, stop immediately and disconnect the negative battery terminal.
These precautions may seem basic. However, following them every time protects both you and your vehicle.
Understanding Your Multimeter Settings
Before you can diagnose electrical fault diagnosis issues, you need to know how to set up your multimeter correctly. Most digital multimeters have a rotary dial with several settings. Here is what the main ones mean:
DC Voltage (V with a straight line)
This setting measures direct current voltage. You will use it most often when testing your car battery, checking fuses, and verifying power at various points in the circuit. Set the dial to 20V DC for most automotive tests.
AC Voltage (V with a wavy line)
Cars use AC voltage in very few systems, such as the alternator output. You will rarely use this setting for basic diagnostics. However, it is good to know it is there.
Resistance (Omega symbol)
This setting measures resistance in ohms. You use it to check if a wire is broken internally or if a component has failed. Always disconnect the circuit before measuring resistance, as live current will give you a false reading.
Continuity (Speaker or Diode symbol)
This is one of the most practical settings. When there is a complete electrical path, the multimeter beeps. This makes it easy to check if a wire is intact without reading any numbers.
How to Test Your Car Battery
The battery is the heart of your car’s electrical system. Therefore, start here whenever you suspect a problem.
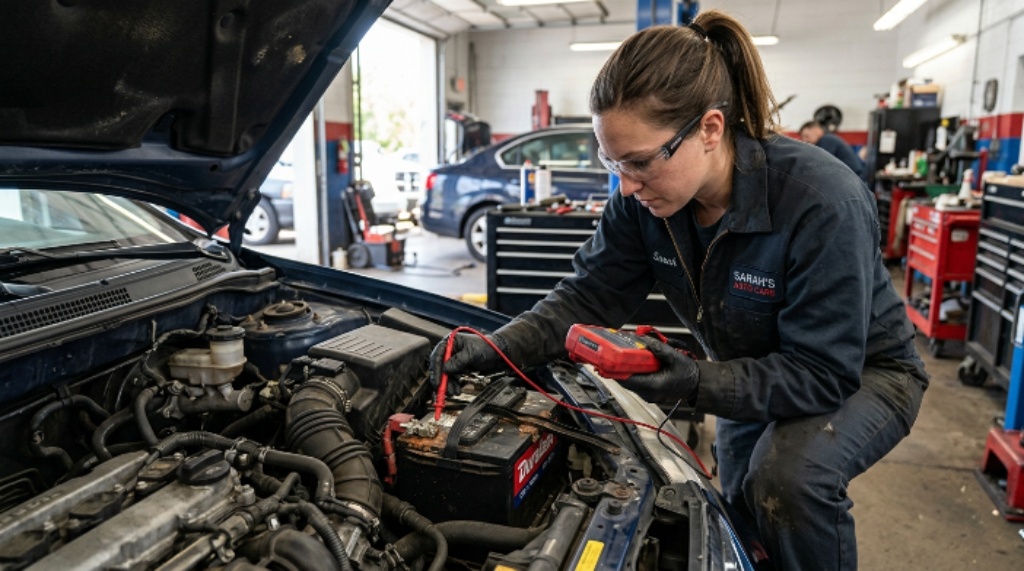
Set your multimeter to 20V DC. Touch the red probe to the positive terminal and the black probe to the negative terminal. A fully charged battery should read between 12.4 and 12.7 volts with the engine off.
If the reading is below 12.0 volts, the battery is weak and may need charging or replacement. Additionally, if the voltage drops sharply when you try to start the car, the battery may not have enough cranking power, even if it reads normal at rest.
Next, start the engine and test again. A healthy charging system should show between 13.7 and 14.7 volts with the engine running. This confirms that the alternator is doing its job.
How to Test Fuses with a Multimeter
Fuses protect your car’s circuits from overload. A blown fuse can disable anything from your radio to your headlights. Therefore, checking fuses is often the quickest way to find a fault.
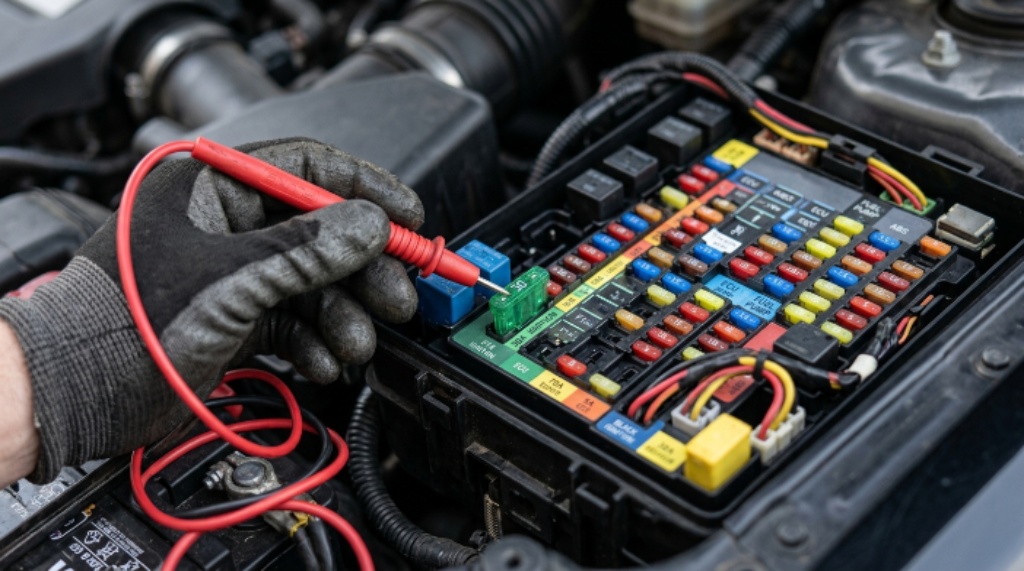
Locate your fuse box. Most cars have two: one under the hood and one inside the cabin, usually on the driver’s side. Your owner’s manual will show you exactly where each one is and what it controls.
Set your multimeter to continuity mode. Remove the fuse and place one probe on each metal tip. A beep means the fuse is good. No beep means it has blown and needs replacing.
However, always replace a fuse with one of the same amperage rating. Using a higher-rated fuse can damage the wiring and create a fire risk.
Tracing Car Wiring Issues Step by Step
When a fuse is fine but a component still does not work, you likely have car wiring issues somewhere in the circuit. Tracing a wiring fault takes patience, but a multimeter makes it manageable.
Start at the component that is not working. Use the voltage setting to check if power is reaching it. Place the red probe on the component’s power terminal and the black probe on a known good ground, such as an unpainted metal bracket or the negative battery terminal.
If you read battery voltage, the problem is likely inside the component itself. If you read zero volts, the fault is somewhere in the wiring between the fuse box and the component.
Work backward toward the fuse box, testing the wire at each connector along the way. When you find a point where voltage is present on one side of a connection but absent on the other, you have found your fault. It could be a corroded connector, a broken wire, or a damaged plug.
Additionally, use the resistance setting to check individual wire segments for internal breaks. A good wire will show very low resistance, close to zero ohms. A broken wire will show infinite resistance or no reading at all.
Testing Ground Connections
Poor ground connections cause a surprising number of car electrical problems. Grounds are the return paths for electrical current. When they corrode or loosen, all sorts of strange things can happen: dim lights, erratic gauges, or components that work intermittently.
To test a ground, set your multimeter to DC voltage. Place the black probe on the negative battery terminal and the red probe on the ground point you want to test. With the circuit active, a reading close to zero means a good ground. A reading above 0.5 volts suggests a bad ground connection.
Therefore, if you find a high reading, clean the ground point with a wire brush and re-tighten the connection. Many mysterious electrical issues disappear after a simple ground cleaning.
When to Call a Professional
A multimeter can solve many common problems. However, some electrical fault diagnosis tasks go beyond what a basic tool and home testing can handle. Here are situations where professional help is the smarter choice:
- The problem involves the engine control unit (ECU) or other complex modules.
- You have traced the fault but cannot safely access the damaged wiring.
- Multiple systems are failing at the same time, suggesting a deeper systemic issue.
- You are working on a hybrid or electric vehicle, where high-voltage systems require specialized equipment and training.
Knowing your limits is part of being a responsible DIY mechanic. There is no shame in handing off a complex job to a certified technician.
Conclusion
A multimeter is one of the most powerful tools in any home mechanic’s arsenal. With it, you can test your battery, check fuses, trace wiring faults, and verify ground connections. These skills form the foundation of any solid auto repair guide approach to electrical problems.
Start simple and work systematically. Test the battery first, then the fuses, and then trace the circuit from the fuse box to the faulty component. Additionally, always prioritize safety by turning off the ignition and using proper protective gear.
Most car electrical problems are not as complicated as they first appear. With patience and the right tool, you can solve a wide range of issues yourself. Therefore, invest in a reliable multimeter today and start building confidence under the hood.
Frequently Asked Questions
1. Can a multimeter damage my car’s electronics?
No, a standard digital multimeter will not damage your car’s electronics when used correctly. Always use the appropriate setting for each test. Avoid using the current (amperage) setting unless you know exactly what you are doing, as this requires the meter to be placed in series with the circuit and can cause problems if done incorrectly.
2. What voltage should my car battery show when healthy?
A fully charged car battery at rest should read between 12.4 and 12.7 volts. With the engine running, the alternator should push that reading up to between 13.7 and 14.7 volts. Anything below 12.0 volts at rest suggests the battery is discharged or failing.
3. How do I know if my alternator is the problem and not the battery?
Start the engine and measure the voltage at the battery terminals. If the reading is between 13.7 and 14.7 volts, the alternator is working. If it reads the same as the resting battery voltage or lower, the alternator is likely not charging. You can also turn on the headlights and air conditioning to load the system and see if the voltage drops significantly.
4. What is the best multimeter for car diagnostics?
For most home users, a mid-range digital multimeter priced between $25 and $60 is more than adequate. Look for a model with a clear display, auto-ranging capability, a continuity beep function, and CAT III safety rating. Brands such as Fluke, Klein, and AstroAI offer reliable entry-level options well-suited to automotive use.
5. Do I need to disconnect the battery before testing wires?
It depends on the test. For resistance and continuity tests, always disconnect the battery or at least isolate the circuit first. Live current will give false readings and could damage the meter. For voltage tests, the circuit must be live, so the battery stays connected. Always double-check which mode you are using before you probe anything.
Related Topics:
How to Get a Cheap Car Paint Job Without Compromising Quality
How to Detail Classic Cars Using Soft Automobile Polishing Pads